
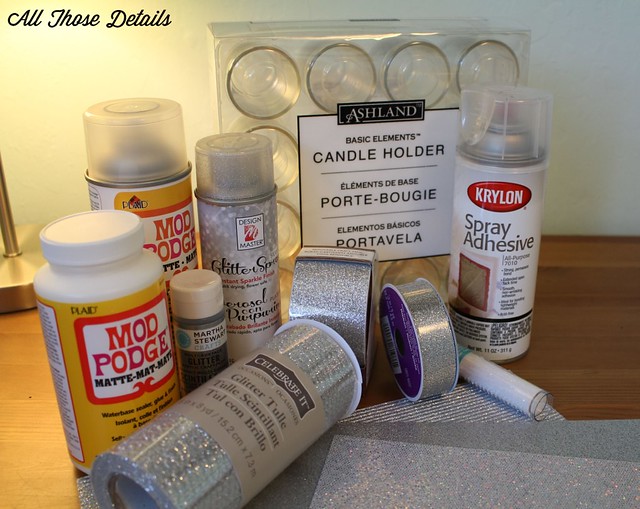
My best friend is also engaged (yay!), and is in the process of planning her wedding for next summer. She has some fantastic DIY decor ideas and right now she’s assigning projects to her freinds and family so we can help her figure out how to practically make things. My assignment… Glitter candle holders. To tackle this, I basically went to the craft store and bought a sample of anything glittery that could be used to glitter-fy glass candle holders. And there were a LOT of options! Good news is that there was definitely a clear winner in looks, and the bonus was it was one of the easiest to make!
Now, I this assignment take this very seriously. I decided to run a experiment to see what method would be best with regards to cost, level of difficulty, mess, and overall effect/look. I decided on six different materials to test. I have summarized each material below, and then provided more detailed directions for the winner at the end of this post. My material candidates were:
- Glitter Duct Tape
- Loose Glitter
- Glitter Paint
- Glitter Ribbon
- Glitter Tulle
- Glitter Spray Paint
My process was to decorate a candle holder with each material and then light candles in all of them to determine how it looked in the end.
One – Glitter Duct Tape
Details: Looked cool, but the tape was too thick to let light through. Could be used to decorate something solid, like a box.
Two – Loose Glitter
Details: The most traditional choice. This one had a great overall effect, but it was pretty messy to make. Another factor is that they might have to be stored and moved in the months prior to the wedding, so durability matters. Glitter that was knocked off was hard to fix without it looking weird. But it is so pretty!
Three – Glitter Paint
Details: I used Martha Stewart brand and high hopes. However, on glass it dried streaky and weird. A definite no.
Four – Glitter Ribbon
Details: The ribbon was pretty and easy to apply. The only issue is gluing a flat ribbon to a curved surface, making it a bit tricky to apply. Also, if glue got outside the ribbon it looked pretty sloppy. Precision was key with this one.
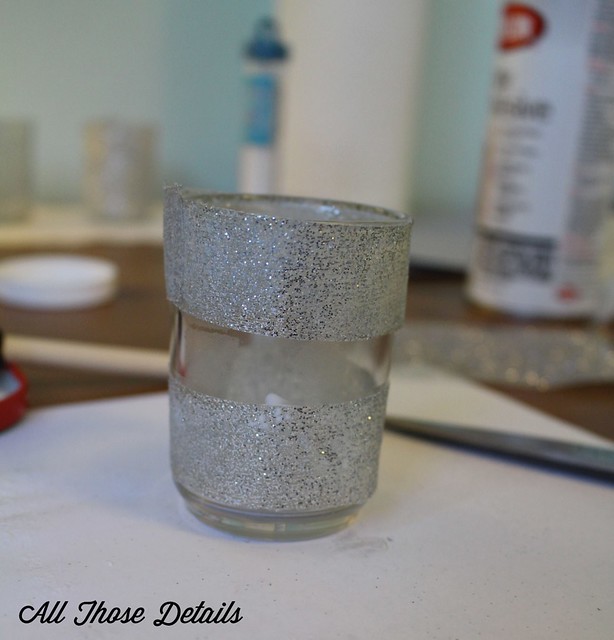
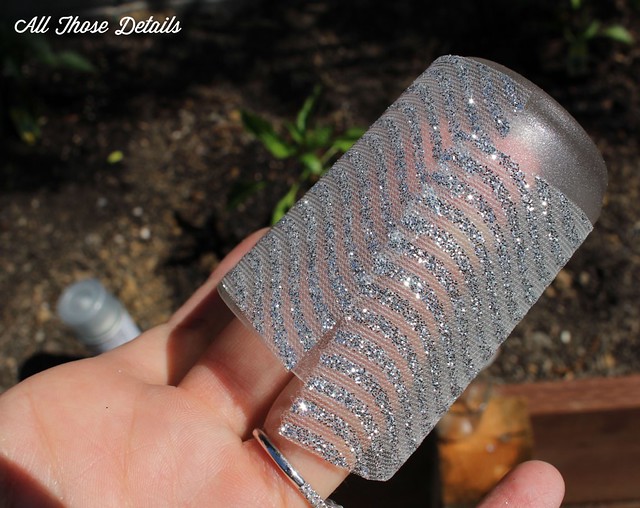
Five – Glitter Tulle
Details: This material was something I didn’t know existed before my recon trip at the craft store. I also like that it has a wavy pattern on the tulle. Overall, pretty easy to assemble, durable, and this one gets major overall effect points too!
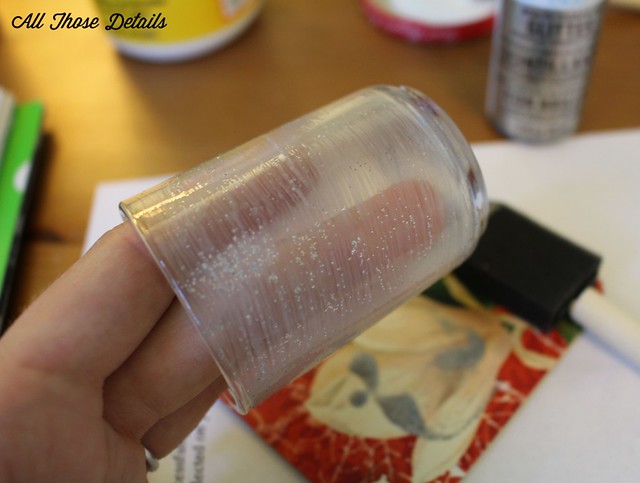
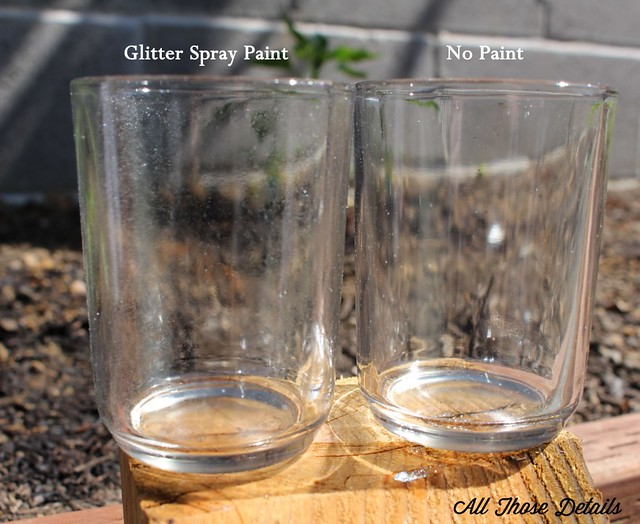
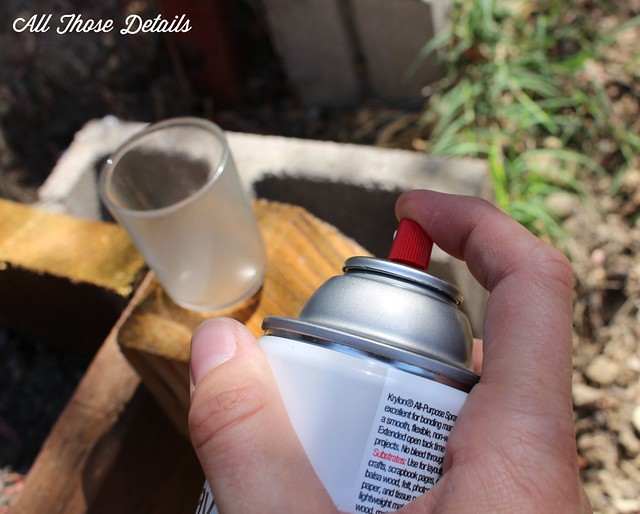
Six – Glitter Spray Paint
Details: Glitter spray paint was very easy to apply (definitely the easiest of them all), but it didn’t have much of an effect. This spray paint might be nice for making flowers slightly sparkly, but it didn’t have the super-glitter effect we were looking for. You can see in the picture that after two coats it barely made a difference.
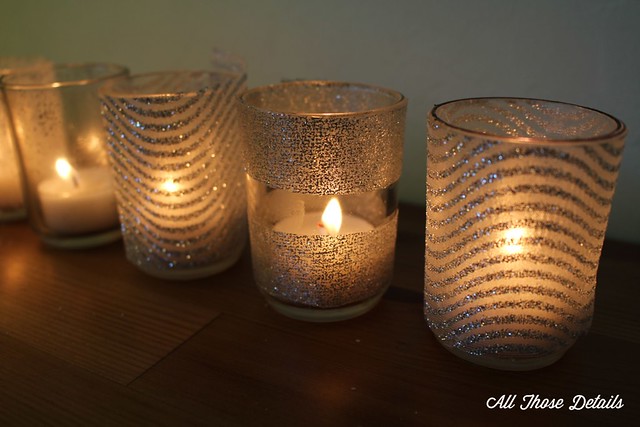
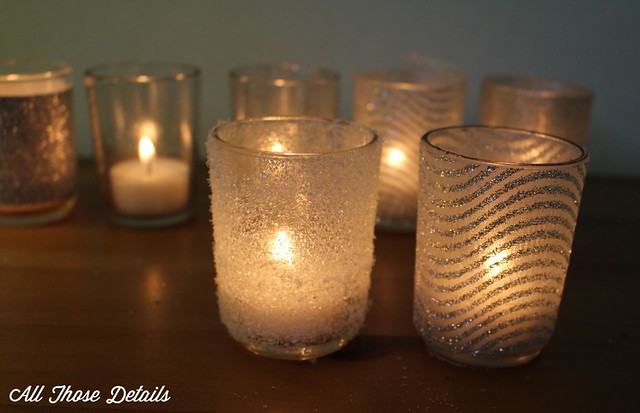
 Below are all the materials together, so you can see the effect with a candle. They’re all nice, but a couple definitely stand out. My top two choices are the loose glitter and the glitter tulle. Which is your top choice?
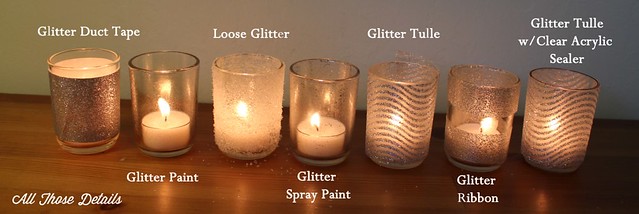
The loose glitter and glitter tulle. These two definitely have the prettiest effect.
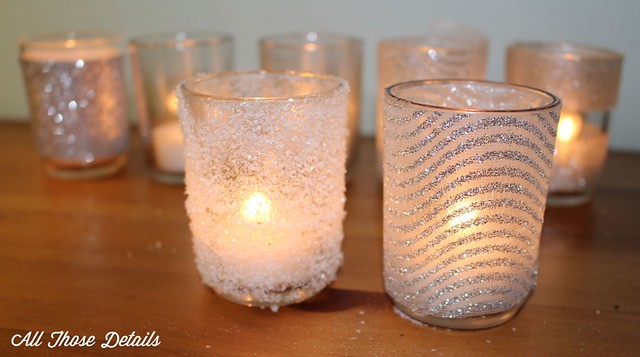
And, so THE WINNER is…
Glitter Tulle!
We’re you surprised? I think it was the clear glittery winner. I expanded on some more detailed directions below.
Glitter Tulle Candle Holders – More detailed directions
Since the candle holder is curved, a rectangle shape of tulle won’t line up right (see the picture below!)
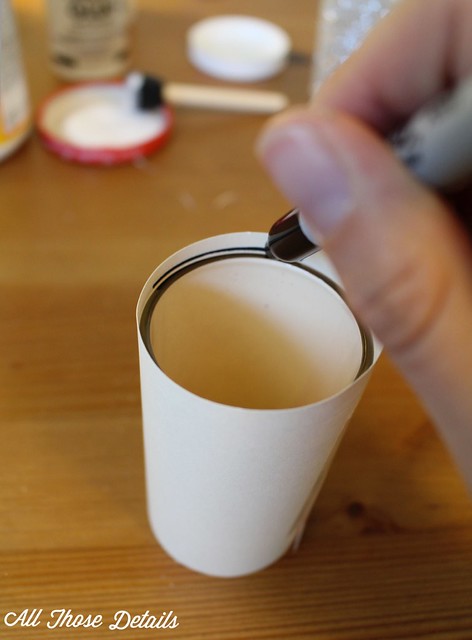
To simplify cutting the tulle, I made a template out of paper. Simply wrap a piece of cardstock around the candle holder and trace the top and bottom with a marker.
Remove the paper, and cut along the marker lines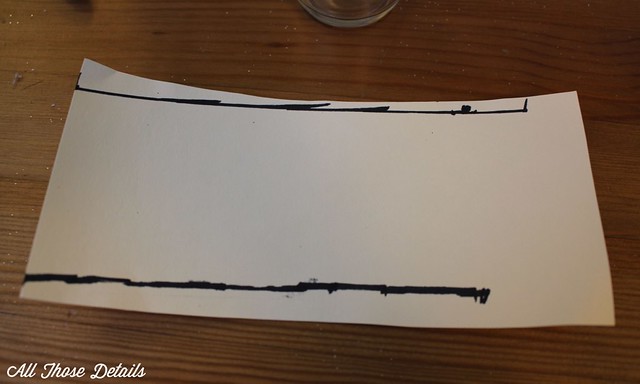
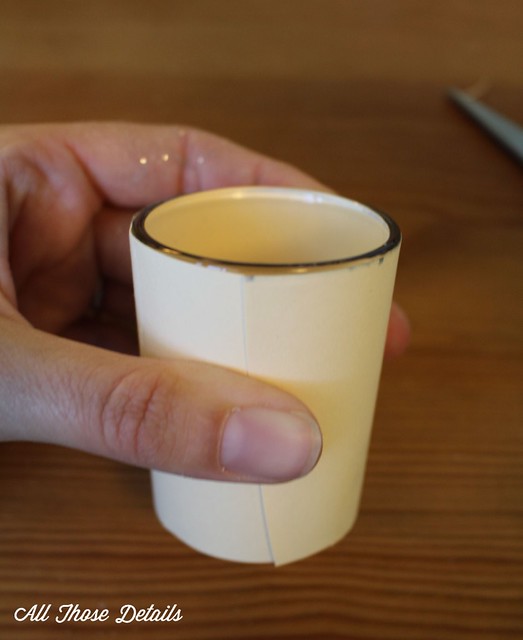
The template is only slightly curved, but it’s just enough to get the ends to line up.

See? Perfect fit!
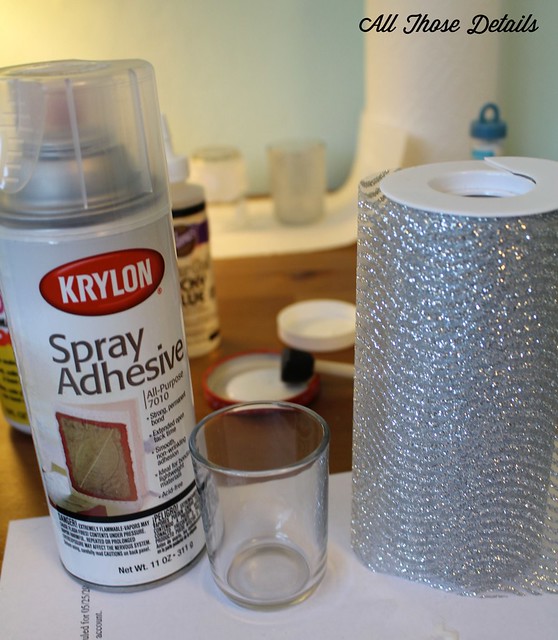
To attach the tulle, I used spray adhesive and sprayed a light, even layer over the whole candle holder. Doing this outside is best. I let it set up for a minute to get slightly tacky.
Then I carefully layed the tulle in place and pressed it down. Keeping a couple fingers inside the candle holder let me spin it around without touching the spray adhesive.

To protect the glitter, I finished it off with a clear acrylic sealer (I used modge podge brand). That’s it! Pretty straightforward!
While all the materials turned out okay, the glitter tulle was the easiest, was fairly inexpensive, and also produced beautiful results. Do you have any suggestions for sprucing up candle holders?

Woohoo! You are my hero. I knew the moment I saw them that the glitter tulle was the winner. Thank you so much for trying all these!!