
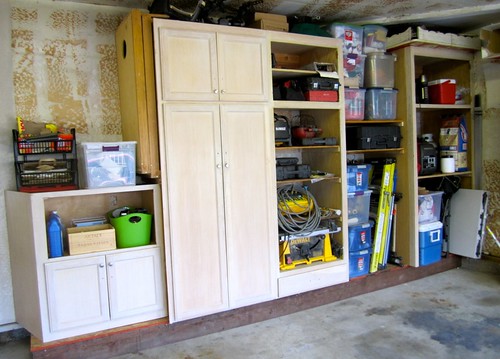
 After combining households, our garage was a packed. While I had some nice cubbies the previous owner had installed, they were practically falling apart. Then the Boyfriend came home with a kitchen’s worth of free cabinets (my reaction: what! can’t you see what our garage already looks like!)
After my initial shock of coming home to this…
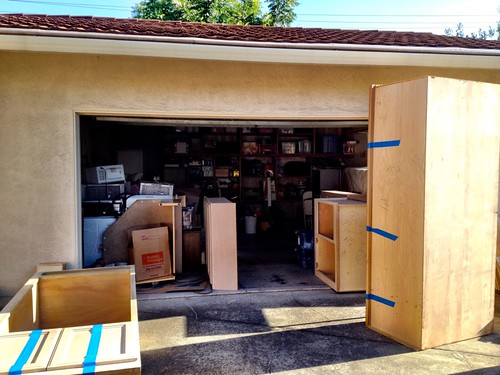
So much stuff, the garage door won’t even close!
I realized what a great idea The Boyfriend had. Garage “organizing systems” are expensive, and he had found a great cheap way for us to tackle our garage mess. We were lucky to know someone who was redoing their kitchen and was planning to throw out their cabinets, which allowed us to haul them to our house ourselves at no cost. If you don’t have such a friend (or aren’t gutting your own kitchen), craigslist is a great option for finding old kitchen cabinets.
- Level (4-6 ft)
- String line
- Circular Saw
- Hammer
- Drill w/screwdriver bit
- Caulking gun
- Pencil
- Tape Measure
- Drill bit
- Countersink bit
- Clamps
- Recycled cabinets
- One sheet 5/8-inch OSB or plywood
- Pressure treated 2’x12’x16′ (length dependent on dimensions of garage)
- A box of 8 VC penny nails
- 2 tubes polyurethane construction adhesive
- 3-inch wood screws
- 1 1/2-inch wood screws
- Shim shingles
- What’s going to go in all these cabinets? We started by organizing things in piles in the garage and collecting everything by type (sports equipment, tools, christmas decorations).
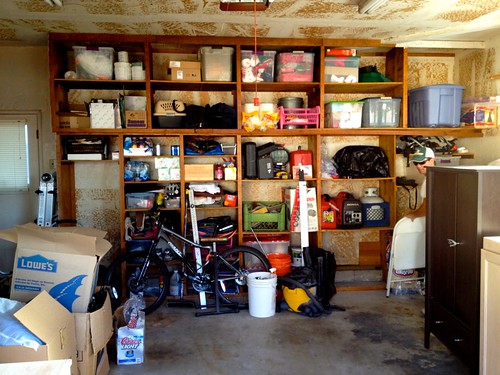
The “Before” shot. Some of it is crap, some is stuff we need. Major purging (& the garage sale) had to happen!
- Then determine how the cabinets can fit all your things. It’s okay to rearrange things later, but having a general idea will allow the best use of the space. We didn’t have enough bottom cabinets to fill the entire back wall, so rather than bunch them all together, we left a space in the middle big enough for two plastic totes, so we could store all our christmas stuff there. This is also a time to purge what you don’t need.
- Get creative with how you use the cabinets. For example, we added shelves to a fridge cabinet, turned a microwave cabinet upside down (on the far left of the back wall), made a gap a storage space for totes, and cut a hole in the back of an upper cabinet to allow for the fuse box. Make them work for you and your stuff!
- The platform will need to be 2 ft wide. The length will vary depending on how many cabinets there are and their size. Cut the plywood sheet in half lengthwise, making 2 pieces 2 ft wide.
- Luckily, in our garage we had 2″ of level mud sill showing along the outside wall, which allowed us to use that to support the back side of the platform. If you don’t have a mud sill to use, you’ll have to make a support piece for both the front and back.
The mud sil on the left, and The Boyfriend lining up the front board of the platform on the right.
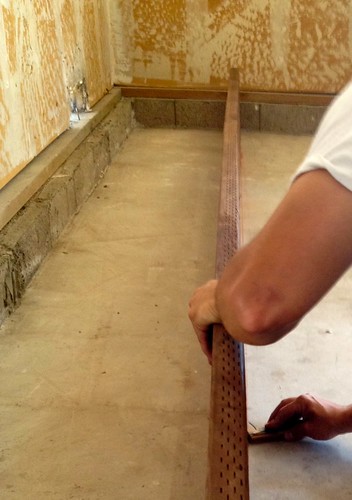
- To make the front platform support piece, The Boyfriend scribed the 2×12 with a pencil to indicate the actual grade of the concrete floor. Then cut along the pencil line to ensure the board sits flush with the concrete. Next, with the newly cut side to the floor, measure the height of the mud sill and use to snap a chalk line to mark the height. Then cut the board at the chalk line. Cut the 2×12 to the correct length.
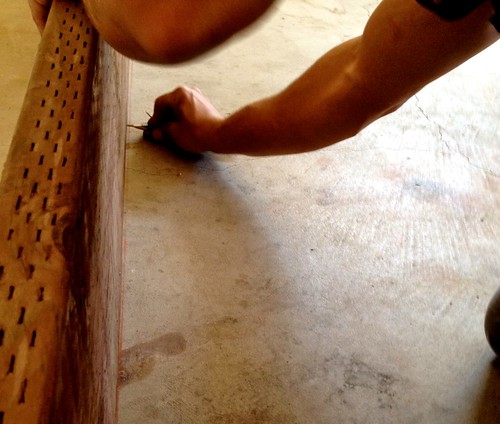
Scribing, using a carpenter’s pencil, is just running the pencil along the bottom of the board, allowing the line to account for any changes in the concrete floor.
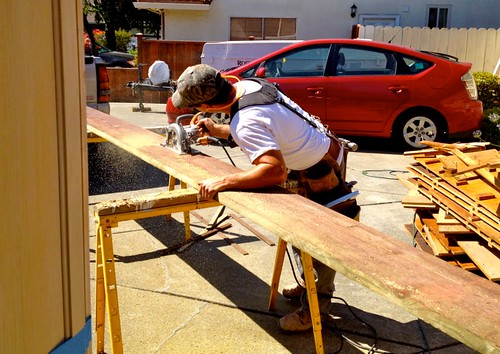
Trimming the 2×12 to match the top chalk line.
- Measure 2 ft out from the mud sill and mark a line every 2 ft to ensure the board is properly positioned (we snapped a chalk line). Then align and glue the board to the concrete using construction adhesive.
- To support the plywood, we used the extra pressure treated 2×12 pieces and cut it to fit between the mud sill and front board approximately every 2 ft.
- To install the plywood decking, cut the 2 ft wide sections of plywood to length. Then using construction adhesive, run a 1/4-inch bead of glue on top of the pressure treated wood. Set down and align the plywood and secure with 8 penny nails.
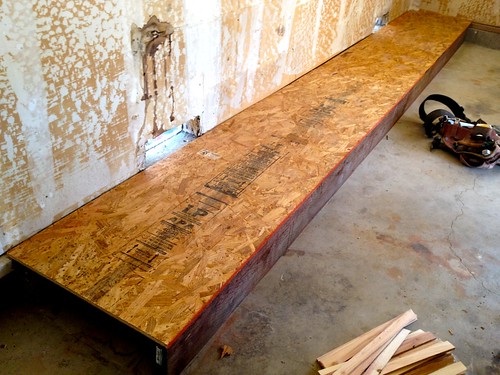
Finished platform!
- Next is the fun part, laying out the cabinets. In step one, we determined generally where everything would go on the platform. Now place the cabinets in their spots to make sure they’ll all fit (before nailing them down!)
- Remove doors and shelves, to make installation easier and avoid pinched fingers.
- Using a level, find the “high” side of the platform. Start securing cabinets on that end.
- Setting the first cabinet is crucial. Make sure it is true, plumb and square. The rest of the cabinets will depend on this one; spend some time making sure to get it right.
Use the level to ensure the first cabinet is as level as possible. Or else the last cabinets will be wonky (that’s a technical term)
- Install cabinets using 3-inch screws into the studs of the wall. Clamp the face frames of the cabinets together & pre drill from one cabinet to the other, then secure using 1 1/2-inch screws using drill bit and counter sink.
- Use shims at the base of the cabinets to keep each cabinet level and plumb to the one previous.
- Drill and countersink 1 1/2-inch screws through the cabinet face at an angle into the plywood floor (since we don’t care what these look like, we drilled
- Screw face of cabinets frames together every 3-4 feet (vertically) to secure together
- When installing upper cabinets, install a temporary ledger for the cabinet to rest on while you complete installation (this will SAVE your arms)
- Draw a level line on the wall, where you want the bottom of the cabinet to fall.
- Use a scrap piece of wood (we used 1×2) and secure it into studs, the top aligning to the line (called a ledger board)
- Lift the top cabinet and rest on the ledger board. Secure with 3-inch screws into the studs, just like with the bottom cabinets
Step Seven: Load them up!
- Reinstall doors & install hard wear, if it’s not already on the cabinets.
- As we laid things out to go in each cabinet, measure and install shelves at the proper height.
- We made some extra shelves for our heavy duty shelves for tools, plastic totes and other heavy things by using extra plywood from the platform.
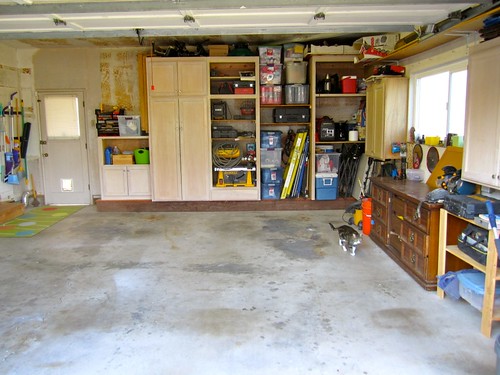

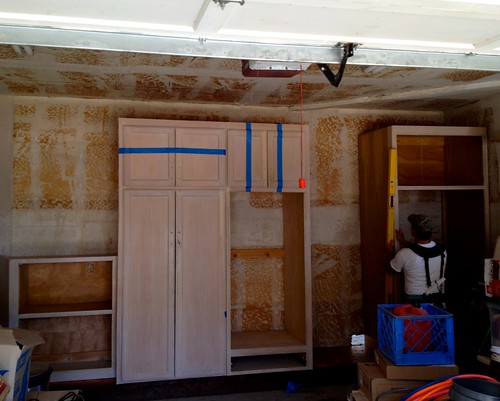
That looks amazing!
Thanks! It’s so great. I’ll have a post soon about how we organized everything. It makes me happy every time I pull my car in!
Pingback: Installing Wall Cabinet Garage - New Storage Solutions
Pingback: Picking Garage Cabinets | Mental Itch
Pingback: Picking Garage Cabinets | LifeSwirl