
One of my projects right now is finishing my craft room. Yes, I have a craft room! It’s the first time I’ve actually had a dedicated space for crafts and such, so I am ridiculously excited. Once I’m done, I’ll have a post about it and how I organize craft supplies, but for now I just want to talk about my most recent project a lampshade rehab.
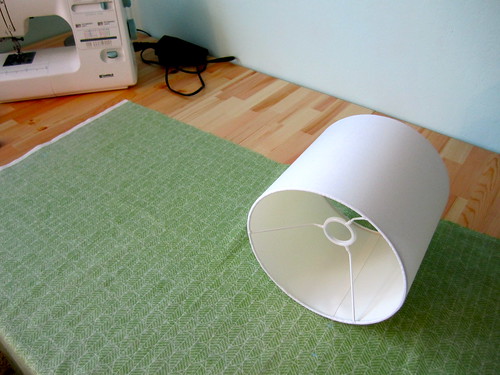
 I have a cheap table lamp with a white shade that is cute but plain. I want to jazz it up a bit, so I decided to recover the shade with some fun fabric I had lying around.
Materials
- Lampshade (preferably a cheap one that has a plastic coating on the inside so the glue won’t bleed through)
- Fabric Glue
- Lightweight Fabric (cotton works great)
- Scissors
- Iron & ironing board
- Ruler / straight edge
- Tape (any kind that won’t leave a residue on the fabric)
- Marking chalk or pencil
Time
About 1.5 hours, plus 2-4 for the glue to dry
Difficulty
Medium – mostly because everything needs to be straight!
Details
- Pick your fabric. You don’t want something too thick because the light needs to shine through. I just used quilting cotton with a leaf print
- Line up the seam of the shade with the edge of the fabric and roll the shade along the fabric to determine how much fabric you need. If your shade is tapered, trace the shade as it curves.
Roll shade all the way around, then mark with chalk or a pen
- Cut fabric leaving 1-2 inches on each seam. When the light is on, you will see the seam, so consider the proportions of the shade. For my 8 inch shade, I left about 1 1/4 inches extra on each seam. That way I could iron a 1/2 inch hem and have a little extra.
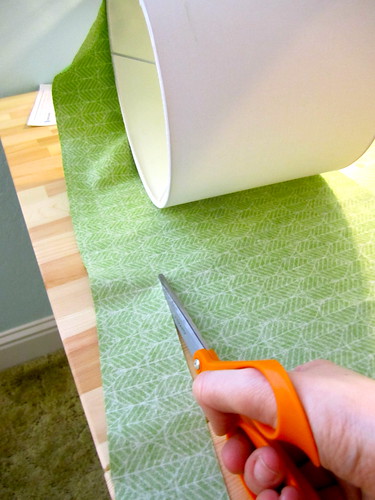
Note: You can see that I changed my mind about the size of the overlap after gluing the first side, and had to trim some off the bottom
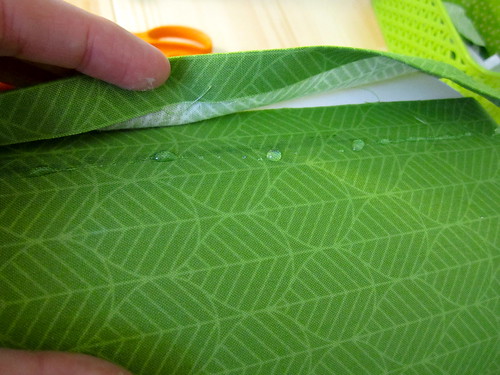
- Iron edges of the fabric to create straight hems. As I just mentioned, you will see these lines when the light is on, so make sure they’re straight! Consider using a ruler to straight edge. My fabric had lines, so I used those to make sure I was cutting and ironing straight
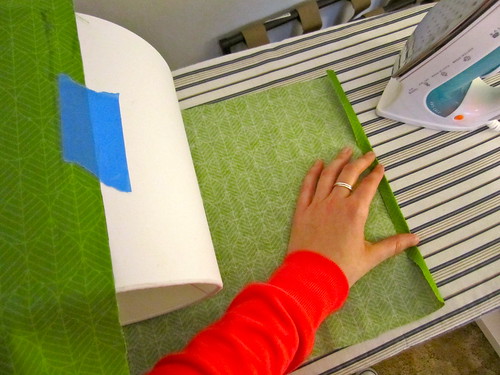
As you can see in the pictures, I did not iron before gluing on the first side of the fabric. Mistake! It really makes ironing a pain
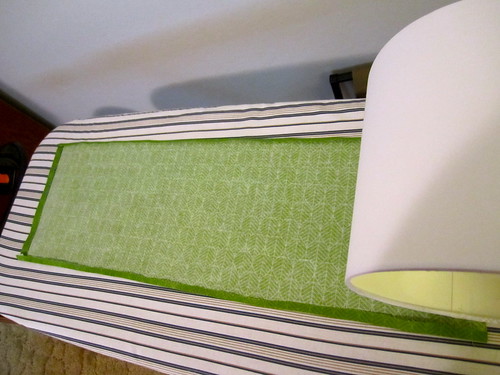
Iron three seams, I left about 1/2 inch
- Glue the first side of the fabric. Use a brush to spread out the glue so it doesn’t bleed through. Tape in place so it doesn’t shift while finishing.

Brush out the glue to avoid bleed-through
Tape fabric as you glue so it stays in place
- Wrap fabric around shade, pulling tight. Especially if your fabric has a pattern, make sure fabric is going on straight. This took me a few tries to get everything lined up. Glue the end, brushing out glue with a brush. Tape into place
Lay a light bead of glue and press in place
- Squeeze out a bead of glue along the inner seam of the shade.
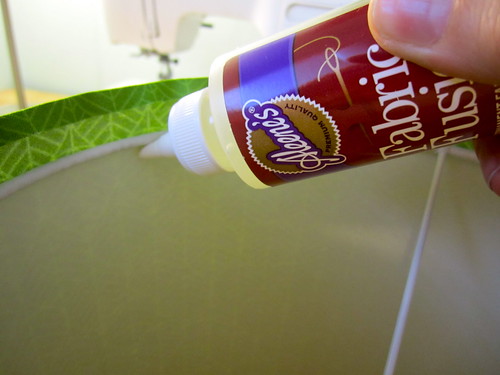
Almost any fabric glue will work. I used "Fabric Fusion"
- For conflicts with the wire frame of the shade, use a sharp pair of scissors to make a small cut in the fabric. Then press fabric around wire.
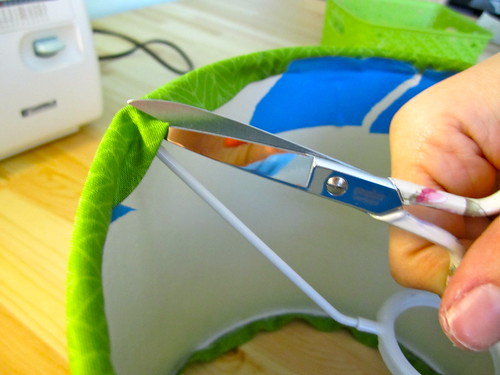
Just make one small cut, so you don't end up with a gap
Press cut ends around wire to make a seamless hem
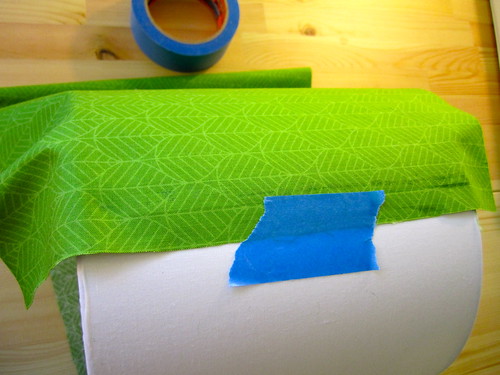
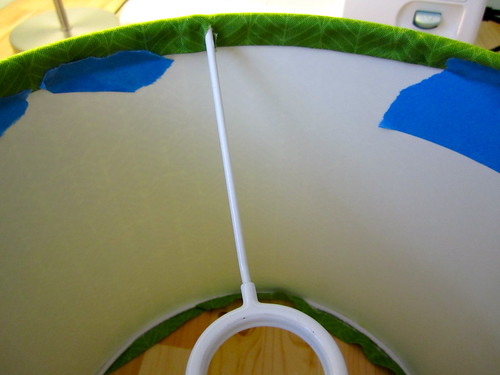
- Lightly pull fabric over the top of the shade and press into glue. Tape into place.
- Turn shade over and repeat on bottom, taping as you press fabric to the glue.
Tape up everything to make sure it doesn't shift
- See glue directions for drying times. I let mine sit for about 4 hours, just to make sure everything was set.
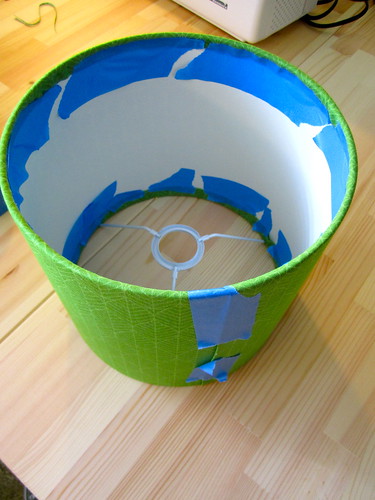
Leave tape on until glue is dry. Then it should pull off nicely.
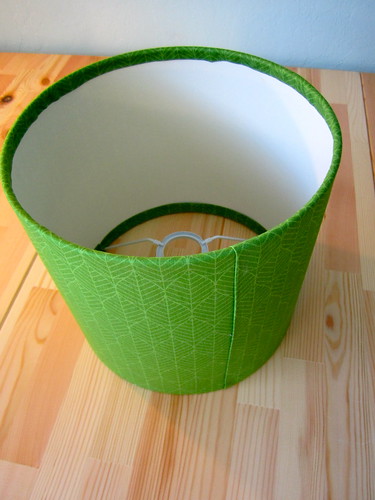
- Pull off tape, put lamp back together, and…. TA DA!
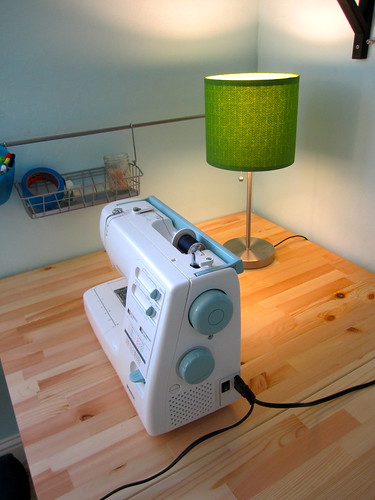
Jazzing up the sewing machine!
I have to say, I’m pretty proud of how it turned out!

Oohh pretty!
Awesome! You have inspired me!